









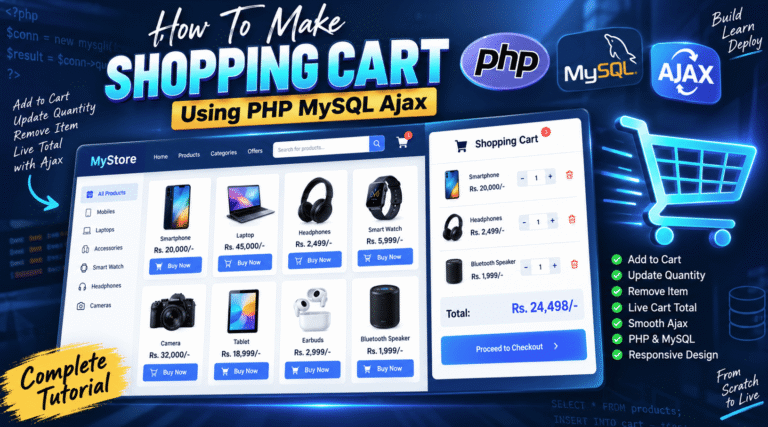
Learn how to create an online shopping cart using PHP MySQL Ajax with product listing, add-to-cart functionality, sessions, cart updates and a working database. How To Make Online Shopping Cart Using PHP MySQL Ajax
How To Make Online Shopping Cart Using PHP MySQL Ajax
Building an eCommerce website can look complicated when you first start learning PHP and MySQL. But one of the best ways to understand how an online store works is to build a small online shopping cart using PHP MySQL Ajax from scratch.
In this tutorial, we will look at how a basic PHP shopping cart works, how products are displayed, how items are added to the cart, how PHP sessions can store cart information, and how MySQL can be used to manage product data.
The project is designed as a practical web development example rather than a huge eCommerce framework. That makes it useful for beginners who want to understand the logic behind an online shopping cart using PHP MySQL Ajax.
The downloadable project contains files such as index.php, cart.php, view.php, config.php, head.php, clear-session.php, style.css, and a MySQL database file.
🎬 Watch the Complete Tutorial
Follow the video tutorial to understand how the PHP shopping cart works from product listing to cart management.
What We Are Building
The main goal of this project is to create a simple shopping cart where a visitor can browse products and add them to a cart.
The basic flow looks like this:
Products → Add to Cart → Cart Session → View Cart → Remove/Clear Cart
Instead of refreshing the entire website for every small interaction, AJAX can be used to communicate with the PHP backend and update the required information.
This is one of the reasons AJAX is still useful when learning traditional PHP development.
Online Shopping Cart Using PHP MySQL Ajax — How It Works
An online shopping cart using PHP MySQL Ajax normally consists of several components working together.
1. PHP
PHP handles the server-side functionality.
For example, PHP can:
- Connect to MySQL
- Retrieve products
- Create sessions
- Store cart information
- Calculate quantities
- Calculate totals
- Process cart requests
2. MySQL
MySQL stores the permanent application data.
A product table can contain information such as:
- Product ID
- Product name
- Price
- Product image
- Description
The uploaded project also includes a cart.sql database file that can be imported through phpMyAdmin.
3. AJAX
AJAX allows the browser to communicate with PHP without necessarily reloading the complete page.
For example, when a customer clicks Add to Cart, JavaScript/AJAX can send the product information to the server.
PHP then processes the request and updates the cart.
4. PHP Sessions
Sessions are particularly useful for a simple shopping cart.
A visitor does not necessarily need to create an account just to temporarily store products.
The cart can be associated with the visitor’s PHP session.
Project Files
The project structure is straightforward:
shopping-cart/
│
├── index.php
├── cart.php
├── view.php
├── config.php
├── head.php
├── clear-session.php
├── style.css
├── cart.sql
├── bg.jpg
│
└── imeg/
    ├── 1.png
    ├── 2.png
    ├── 3.png
    ├── 4.png
    ├── 5.png
    ├── 6.jpg
    ├── 6.png
    ├── 7.png
    └── 8.png
The imeg directory contains the product images used by the demonstration project.
Database Configuration — config.php
The database configuration file is responsible for establishing the connection between PHP and MySQL.
For a modern project, I recommend using MySQLi or PDO rather than the old mysql_* functions.
A typical MySQLi connection looks like this:
<?php

$host = "localhost";
$username = "root";
$password = "";
$database = "cart";

$conn = new mysqli(
    $host,
    $username,
    $password,
    $database
);

if ($conn->connect_error) {
    die("Database connection failed: " . $conn->connect_error);
}

$conn->set_charset("utf8mb4");

?>
If your hosting provider uses different database credentials, replace the values accordingly.
Creating the Product Database
Before testing the PHP shopping cart, import the supplied cart.sql file into MySQL.
If you are using XAMPP, you can open:
http://localhost/phpmyadminCreate your database and import the SQL file.
The important point is that the database name configured in config.php must match the database you actually create.
Product Listing — index.php
The index.php file acts as the main product page.
A simple PHP product listing can retrieve products from MySQL like this:
<?php

require_once "config.php";

$sql = "SELECT * FROM products ORDER BY id DESC";
$result = $conn->query($sql);

if ($result && $result->num_rows > 0) {

    while ($product = $result->fetch_assoc()) {
        ?>

        <div class="product">

            <img
                src="imeg/<?php echo htmlspecialchars($product['image']); ?>"
                alt="<?php echo htmlspecialchars($product['name']); ?>"
            >

            <h3>
                <?php echo htmlspecialchars($product['name']); ?>
            </h3>

            <p>
                ₹<?php echo number_format($product['price'], 2); ?>
            </p>

            <button
                type="button"
                class="add-to-cart"
                data-id="<?php echo (int)$product['id']; ?>"
            >
                Add to Cart
            </button>

        </div>

        <?php
    }

}

?>
The exact column names should match the SQL structure in your database.
Adding Products to the Cart
The core feature of an online shopping cart using PHP MySQL Ajax is obviously the Add to Cart functionality.
When a user selects a product, JavaScript can send its ID to the PHP backend.
A simple AJAX request using jQuery might look like:
$(".add-to-cart").on("click", function () {

    const productId = $(this).data("id");

    $.ajax({
        url: "cart.php",
        type: "POST",
        data: {
            action: "add",
            product_id: productId
        },
        success: function (response) {

            console.log(response);

        },
        error: function () {

            alert("Something went wrong.");

        }
    });

});
This keeps the browser-side code relatively simple.
Cart Processing — cart.php
The cart.php file can receive the AJAX request and process the selected product.
For a session-based shopping cart, the basic idea is:
<?php

session_start();

if (!isset($_SESSION['cart'])) {
    $_SESSION['cart'] = [];
}

if ($_SERVER['REQUEST_METHOD'] === 'POST') {

    $action = $_POST['action'] ?? '';

    if ($action === 'add') {

        $productId = filter_input(
            INPUT_POST,
            'product_id',
            FILTER_VALIDATE_INT
        );

        if ($productId) {

            if (isset($_SESSION['cart'][$productId])) {
                $_SESSION['cart'][$productId]++;
            } else {
                $_SESSION['cart'][$productId] = 1;
            }

            echo "Product added to cart.";

        }

    }

}

?>
The session now contains the selected product and its quantity.
Why Use Sessions for a Simple PHP Cart?
PHP sessions are convenient for demonstration projects because they allow temporary cart information to be maintained between requests.
For example:
$_SESSION['cart'] = [
    1 => 2,
    4 => 1,
    7 => 3
];
This could mean:
- Product 1 → Quantity 2
- Product 4 → Quantity 1
- Product 7 → Quantity 3
For a production eCommerce platform, however, you may eventually want a more sophisticated database-backed cart system.
Viewing the Cart — view.php
The view.php page can display products currently stored in the session.
A simplified version could look like:
<?php

session_start();

$cart = $_SESSION['cart'] ?? [];

?>

<h2>Your Shopping Cart</h2>

<?php if (empty($cart)): ?>

    <p>Your cart is currently empty.</p>

<?php else: ?>

    <?php foreach ($cart as $productId => $quantity): ?>

        <div class="cart-item">

            <strong>
                Product ID:
                <?php echo (int)$productId; ?>
            </strong>

            <span>
                Quantity:
                <?php echo (int)$quantity; ?>
            </span>

        </div>

    <?php endforeach; ?>

<?php endif; ?>
In the complete project, you can retrieve the product information from MySQL and display the actual product name, price, image, quantity and total.
Clearing the Cart — clear-session.php
A separate file such as clear-session.php can be used to clear the current session cart.
The basic PHP logic is:
<?php

session_start();

unset($_SESSION['cart']);

header("Location: index.php");
exit;

?>
This removes the cart data stored in the current session.
Styling the Shopping Cart
The style.css file controls the visual presentation of the project.
A simple product-card design could be:
.product {
    background: #ffffff;
    border-radius: 15px;
    padding: 20px;
    margin: 15px;
    box-shadow: 0 8px 25px rgba(0, 0, 0, 0.08);
    text-align: center;
}

.product img {
    width: 100%;
    max-width: 220px;
    height: 220px;
    object-fit: cover;
    border-radius: 12px;
}

.product h3 {
    margin: 15px 0 8px;
}

.add-to-cart {
    border: 0;
    padding: 12px 20px;
    border-radius: 8px;
    cursor: pointer;
    background: #2563eb;
    color: #ffffff;
}
You can customize the design according to your website’s branding.
head.php
A separate head.php file is useful when several PHP pages share the same HTML header.
For example:
<!DOCTYPE html>
<html lang="en">

<head>

    <meta charset="UTF-8">

    <meta
        name="viewport"
        content="width=device-width, initial-scale=1.0"
    >

    <title>PHP Shopping Cart</title>

    <link
        rel="stylesheet"
        href="style.css"
    >

</head>

<body>
Then individual pages can include it using:
<?php include "head.php"; ?>This avoids repeating the same HTML structure throughout the project.
Important Security Improvements
If you are using this project as a learning example, it is worth making a few improvements before using it on a real website.
Use Prepared Statements
Instead of directly placing user input into SQL queries, use prepared statements.
$stmt = $conn->prepare(
    "SELECT * FROM products WHERE id = ?"
);

$stmt->bind_param("i", $productId);

$stmt->execute();

$result = $stmt->get_result();
This helps reduce SQL injection risks.
Escape Output
When displaying information obtained from a database, use:
htmlspecialchars($value, ENT_QUOTES, 'UTF-8');This is especially important when displaying user-generated content.
Validate Product IDs
Never assume that a product ID received from AJAX is valid.
Validate it on the server.
$productId = filter_input(
    INPUT_POST,
    'product_id',
    FILTER_VALIDATE_INT
);

if (!$productId) {
    exit("Invalid product.");
}
Remember that JavaScript validation is not a replacement for server-side validation.
Testing the Project on localhost
If you are using XAMPP, copy the project folder into:
C:\xampp\htdocs\For example:
C:\xampp\htdocs\shopping-cart\Start:
- Apache
- MySQL
Then open:
http://localhost/shopping-cart/Import the supplied SQL database through phpMyAdmin before testing the application.
Common Problems
Database Connection Error
Check:
$host
$username
$password
$database
Make sure they match your MySQL installation.
Products Are Not Displaying
Check that:
- The database exists.
- The SQL file has been imported.
- The product table contains records.
- The table/column names match your PHP queries.
Images Are Not Showing
Make sure the image folder is located correctly.
For this project, the archive contains an imeg directory.
Check the spelling carefully because Linux hosting servers are case-sensitive.
AJAX Is Not Working
Open your browser’s Developer Tools and check the Console and Network tabs.
Look for:
- JavaScript errors
- 404 errors
- PHP errors
- Incorrect AJAX URL
- Invalid POST data
Download the Complete Source Code
The project files used for this tutorial are available in the downloadable archive.
Included files:
index.php
cart.php
view.php
config.php
head.php
clear-session.php
style.css
cart.sql
bg.jpg
imeg/
For the published WordPress article, add your actual download button here:
<div style="margin:30px 0;text-align:center;">
    <a href="YOUR-DOWNLOAD-LINK"
       style="display:inline-block;
       padding:14px 28px;
       border-radius:10px;
       background:linear-gradient(135deg,#5B2CFF,#2563EB);
       color:#fff;
       text-decoration:none;
       font-weight:700;">
       📦 Download Complete PHP Shopping Cart Source Code
    </a>
</div>
Useful Resources
For additional PHP and database development, readers can also refer to the official documentation:
- PHP Documentation — PHP Manual
- MySQL Documentation — MySQL Documentation
- jQuery AJAX Documentation — jQuery AJAX Documentation
For your WordPress site, you can also add relevant internal links to your existing PHP, MySQL, JavaScript and AJAX tutorials.
Example internal links:
Replace these URLs with your actual website URLs.
Final Thoughts
Creating an online shopping cart using PHP MySQL Ajax is an excellent project for understanding how frontend and backend technologies communicate with each other.
The project brings several important web development concepts together: PHP sessions, MySQL databases, AJAX requests, JavaScript, HTML and CSS.
Once you understand this basic implementation, you can take the project much further.
You could add user registration, login, product categories, product search, quantity controls, stock management, coupon codes, checkout, order history and online payment integration.
The most important part is to understand the flow rather than simply copying the code. Once the relationship between the browser, AJAX request, PHP backend, session and MySQL database becomes clear, building larger PHP applications becomes much easier.
