







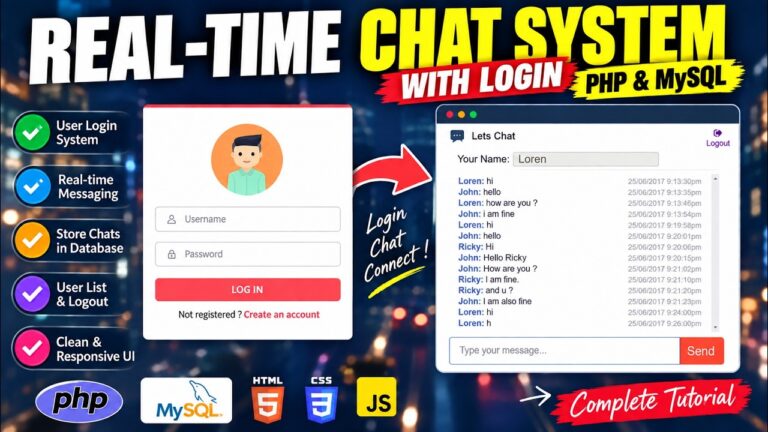
How To Create a Chat Box Using Ajax PHP jQuery HTML5
Learn How To Create a Chat Box Using Ajax PHP jQuery HTML5 with MySQLi, AJAX polling, login, registration, and real-time message updates. How To Create A Chat Box Using Ajax PHP jQuery HTML5.
If you are looking for a simple project to practice PHP, MySQL, AJAX and jQuery, a chat box is a great choice. In this tutorial, we will learn How To Create A Chat Box Using Ajax PHP jQuery HTML5 with a MySQLi database.
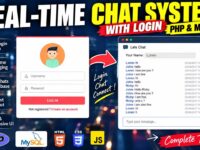
The application allows users to register, log in and send messages. New messages are automatically loaded using AJAX, so the complete webpage does not need to refresh every time someone sends a message.
This project is also useful for beginners because each part is separated into small PHP files.
🎬 Watch the Complete Tutorial
Follow the video tutorial to understand how the PHP shopping cart works from product listing to cart management.
What We Are Going To Build
Our PHP chat box contains:
- User registration
- User login
- PHP sessions
- MySQLi database connection
- AJAX message sending
- jQuery
- Automatic message refresh
- Logout
- Basic responsive interface
The main idea is simple: jQuery sends a message to PHP using AJAX. PHP stores it in MySQL, and another AJAX request loads the latest messages into the chat area.
Project Structure
Create a folder named chat_box_mysql_mysqli:
chat_box_mysql_mysqli/
├── index.php
├── register.php
├── check-login.php
├── chat.php
├── commentajax.php
├── load.php
├── logout.php
├── config.php
└── database.sql
1. Create The Database
Create a database called mychat in phpMyAdmin and import the following SQL.
CREATE DATABASE mychat;

USE mychat;

CREATE TABLE `user` (
    id INT AUTO_INCREMENT PRIMARY KEY,
    regfullname VARCHAR(200) NOT NULL,
    regusername VARCHAR(200) NOT NULL UNIQUE,
    regpassword VARCHAR(255) NOT NULL
);

CREATE TABLE comments (
    id INT AUTO_INCREMENT PRIMARY KEY,
    name VARCHAR(200) NOT NULL,
    comment TEXT NOT NULL,
    post_time TIMESTAMP DEFAULT CURRENT_TIMESTAMP
);
2. MySQLi Connection
Create config.php. This file connects the application to MySQL.
<?php

$host = "localhost";
$username = "root";
$password = "";
$database = "mychat";

$conn = new mysqli(
    $host,
    $username,
    $password,
    $database
);

if ($conn->connect_error) {
    die("Database connection failed.");
}

$conn->set_charset("utf8mb4");
Using MySQLi instead of the old mysql_* functions makes the project compatible with modern PHP versions.
3. User Registration
The registration form sends the user’s details to register.php. The password is securely hashed before it is saved.
<?php

require_once "config.php";
session_start();

$name = trim($_POST["reg_fullname"] ?? "");
$username = trim($_POST["reg_username"] ?? "");
$password = $_POST["reg_password"] ?? "";

$hash = password_hash(
    $password,
    PASSWORD_DEFAULT
);

$stmt = $conn->prepare(
    "INSERT INTO `user`
    (regfullname, regusername, regpassword)
    VALUES (?, ?, ?)"
);

$stmt->bind_param(
    "sss",
    $name,
    $username,
    $hash
);

$stmt->execute();

$_SESSION["uname"] = $username;

header("Location: chat.php");
exit;
4. User Login
The check-login.php file checks the username and password. password_verify() compares the entered password with the stored password hash.
<?php

require_once "config.php";
session_start();

$username = trim($_POST["username"] ?? "");
$password = $_POST["password"] ?? "";

$stmt = $conn->prepare(
    "SELECT regusername, regpassword
     FROM `user`
     WHERE regusername = ?
     LIMIT 1"
);

$stmt->bind_param("s", $username);
$stmt->execute();

$result = $stmt->get_result();
$user = $result->fetch_assoc();

if (
    $user &&
    password_verify(
        $password,
        $user["regpassword"]
    )
) {
    session_regenerate_id(true);

    $_SESSION["uname"] =
        $user["regusername"];

    header("Location: chat.php");
    exit;
}

header("Location: index.php?error=Invalid login");
exit;
5. Send Messages With AJAX
Now comes the main part of our Chat Box Using Ajax PHP jQuery HTML5 project.
When the user clicks Send, jQuery sends the message to commentajax.php.
<?php

require_once "config.php";
session_start();

if (!isset($_SESSION["uname"])) {
    http_response_code(401);
    exit;
}

$message = trim(
    $_POST["user_comm"] ?? ""
);

$name = $_SESSION["uname"];

if ($message === "") {
    exit;
}

$stmt = $conn->prepare(
    "INSERT INTO comments
    (name, comment)
    VALUES (?, ?)"
);

$stmt->bind_param(
    "ss",
    $name,
    $message
);

$stmt->execute();

echo "success";
Notice that the username comes from the PHP session instead of trusting the username sent by the browser.
6. Load The Messages
Create load.php to retrieve the messages from MySQL.
<?php

require_once "config.php";

$result = $conn->query(
    "SELECT name, comment, post_time
     FROM comments
     ORDER BY id ASC"
);

while ($row = $result->fetch_assoc()) {

    echo '<div class="chats">';

    echo '<strong>' .
        htmlspecialchars($row["name"]) .
        ':</strong> ';

    echo nl2br(
        htmlspecialchars($row["comment"])
    );

    echo '<small style="float:right">' .
        htmlspecialchars($row["post_time"]) .
        '</small>';

    echo '</div>';
}
htmlspecialchars() is used before displaying user-generated content, which helps prevent HTML from being interpreted as code.
7. jQuery AJAX Refresh
Add the following JavaScript to chat.php:
function post() {

    $.ajax({
        type: "POST",
        url: "commentajax.php",

        data: {
            user_comm: $("#comment").val()
        },

        success: function() {

            $("#comment").val("");

            $("#result").load("load.php");
        }
    });

    return false;
}

setInterval(function() {

    $("#result").load("load.php");

}, 2000);
The setInterval() function checks for new messages every two seconds. Because the request happens in the background, the entire page does not reload.
For a small learning project, this approach is easy to understand. A large production chat application would normally use a more specialized real-time solution such as WebSockets.
8. Logout
Finally, create logout.php:
<?php

session_start();

session_unset();
session_destroy();

header("Location: index.php");

exit;
Download Complete Source Code
⬇️ Download Complete Source Code
Download the complete PHP, MySQLi, AJAX, jQuery and HTML5 Chat Box project.
How To Run The Project
For XAMPP users, copy the project into:
C:\xampp\htdocs\chat_box_mysql_mysqli\Start Apache and MySQL, import database.sql through phpMyAdmin, and open:
http://localhost/chat_box_mysql_mysqli/Register an account, log in and start sending messages.
Final Words
Creating a Chat Box Using Ajax PHP jQuery HTML5 is an excellent beginner project for understanding how frontend and backend technologies communicate.
HTML5 creates the page structure, CSS handles the design, jQuery sends AJAX requests, PHP processes the requests, and MySQL stores the messages.
The updated version also replaces the old PHP MySQL functions with MySQLi and prepared statements, making it much more suitable for modern PHP development.
You can extend this project later by adding online users, private messaging, profile pictures, typing indicators, unread messages and notifications.
Useful resources: PHP MySQLi, PHP Prepared Statements, and jQuery AJAX.
For more tutorial visit: PHP Tutorials, AJAX Tutorials, and jQuery Tutorials
